Introduction
This page describes the steps necessary to enable Boomerang Notification Framework to send faxes through FaxLogic’s cloud based fax service. Prior to configuring FaxLogic Boomerang Notification Framework needs to be installed. For installation instructions view this page.
Fax Service Provider
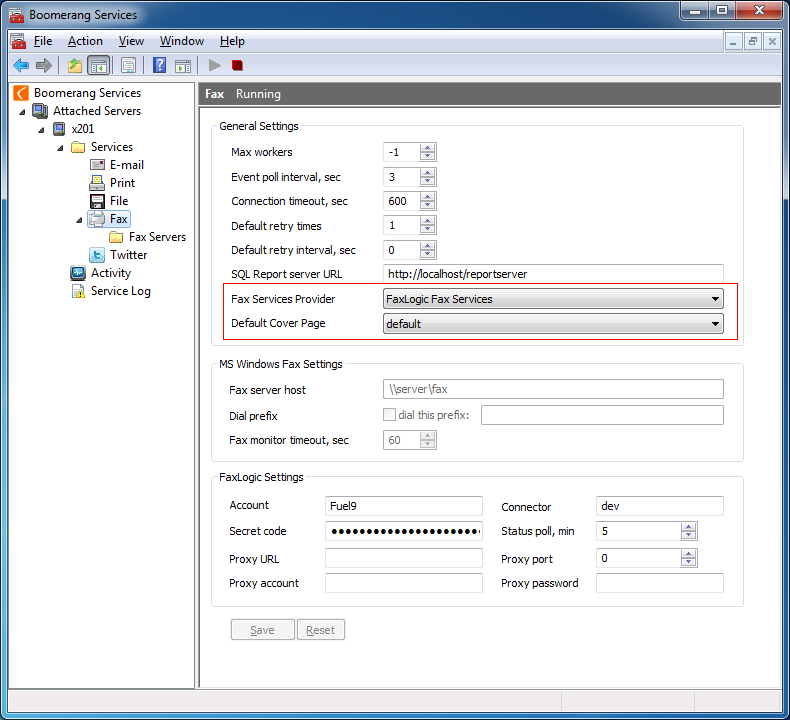
From the Administration Console navigate to the Fax node. Select FaxLogic Fax Services from the Fax Services Provider drop down.
Cover Pages
Default Cover Page
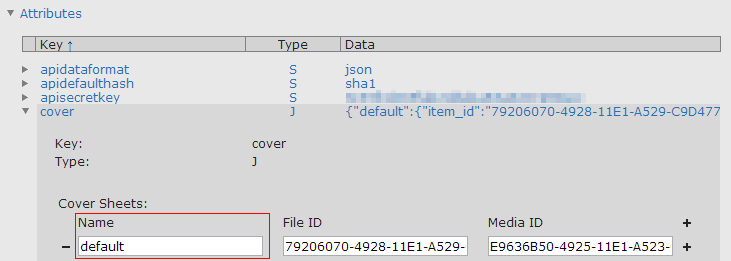
A default cover page may be specified. The name of the cover page need to match the name specified the cover page section in the FaxLogic Administrator Dashboard
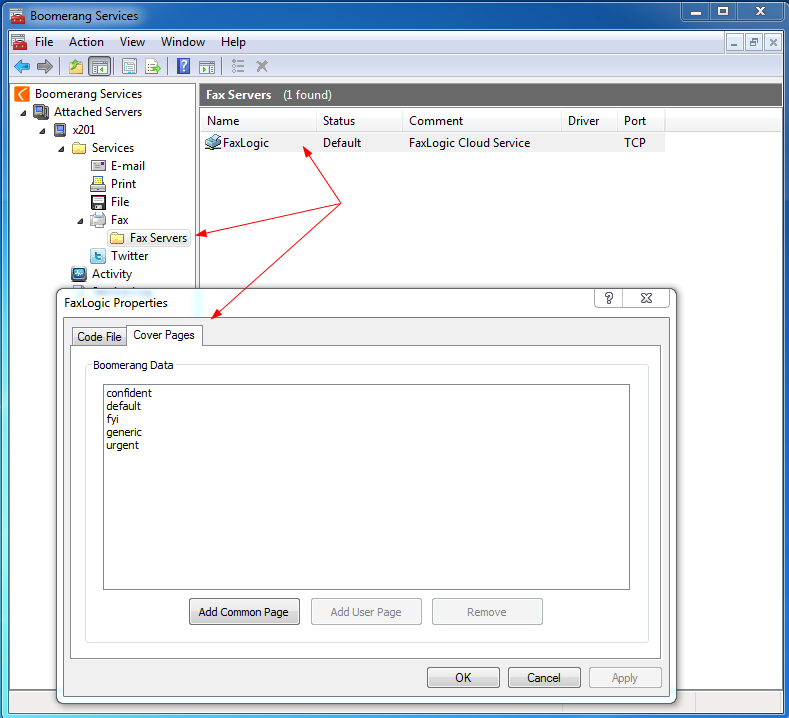
Add Cover Page
To add the name of a new cover page navigate to Fax – Fax Servers and double click on the listed fax server. Select the tab named Cover Pages and click on Add Common Page.
FaxLogic Settings
The four settings needed are Account , Connector, Secret code and polling interval in minutes.
Account, Connector and Secret Code
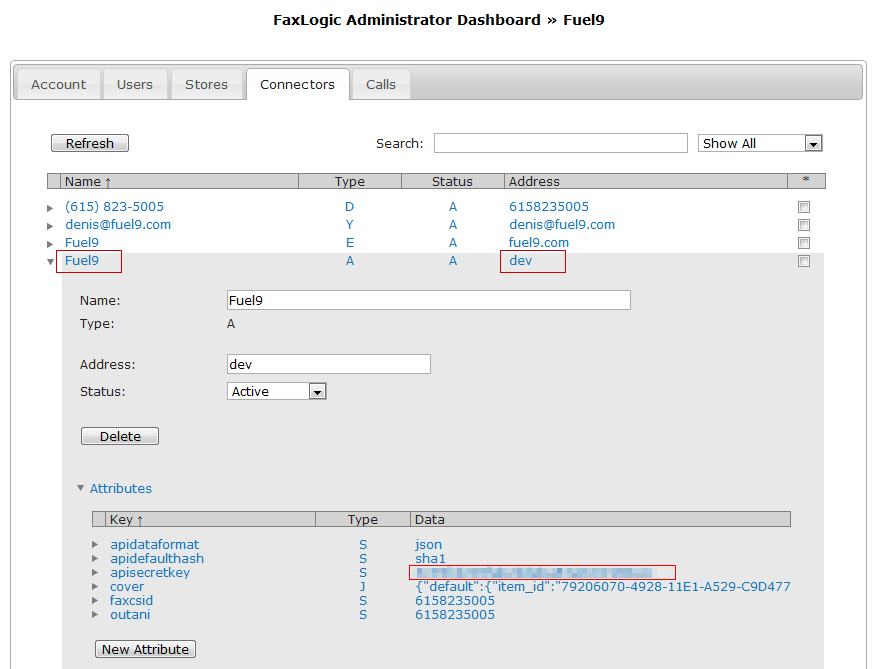
Enter your FaxLogic (Account) Name in the Account field. Enter your FaxLogic Address in the field Connector. Enter your FaxLogic (secretkey) apisecretkey in the field Secret code.
To retrieve your FaxLogic connection details open your FaxLogic Administrator Dashboard and navigate to the Connectors tab and expand the row named A in column Type. Your connection details will be found as below illustrated.

Status Poll
Status Poll, min defines how often, in minutes, that Boomerang Notification Framework will poll the FaxLogic service for fax status information e.g. success, failure. Fax status will be saved in EVENT_LOG and EVENT_STATUS tables. The recommended setting is 5 minutes.
Proxy
If your network configuration requires that a Proxy is used then enter appropriate proxy details in Proxy URL, Proxy Port, Proxy account and Proxy password


